
All you need for this guide is your “About Me” page, a photo of yourself and some text where you can write a brief description of yourself, or your accomplishments in blogging. Then, you can configure the About Me Image gadget as explained below:
1. Go to the Layout section of your blog’s dashboard and Edit the gadget called “About Me” which is usually found in the sidebar (or you can look for the area where it appears in our demo).
2. Add some intro text about you (or your blog) by using the “Caption” field:
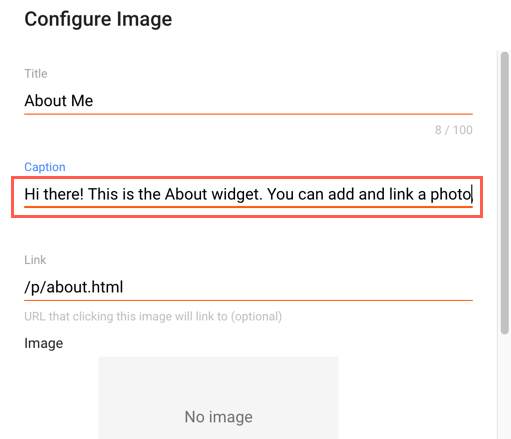
Optional: You can use the Link field below to add the URL to any page published on your blog (such as “About me”), or it could be an external site (like your Instagram profile). This will make your image clickable and it will send your visitors to that page.
3. Next, select the “Upload image from computer” option and click the Browse… button to upload your photo.
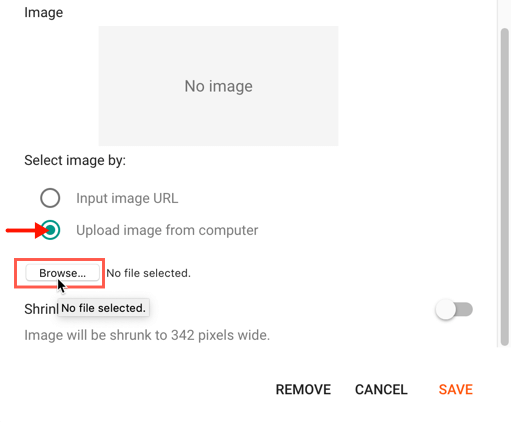
Note: don’t check the “Shrink to fit” option.
4. When you’ve finished adding all the details, click on the “SAVE” text to apply the changes.
And this is how you can configure the About Me Image gadget in Blogger. You can also check our guide on How to Add Author Profile/Bio Box Below Post.