After you finished to install the Blogger theme, you’ll now be able to see all the options that come with the theme from the Blogger Customizer page. Here you can change the fonts and colors with just a few clicks. The Customizer will also provide a live preview on the right which will help you see all the changes in real time.
Changing the Fonts or Colors in Blogger Customizer
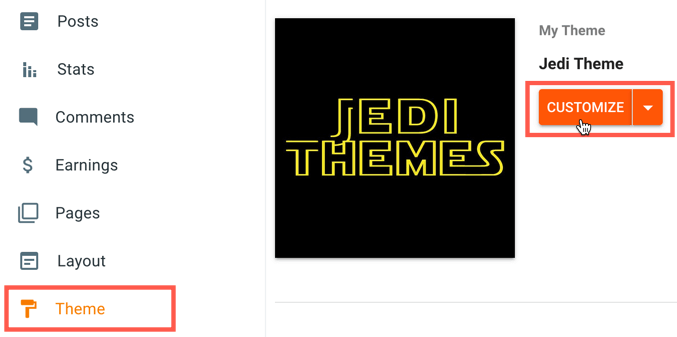
1. To access the Customizer, login to your Blogger dashboard and select Theme from the left-hand menu > click the Customize button.

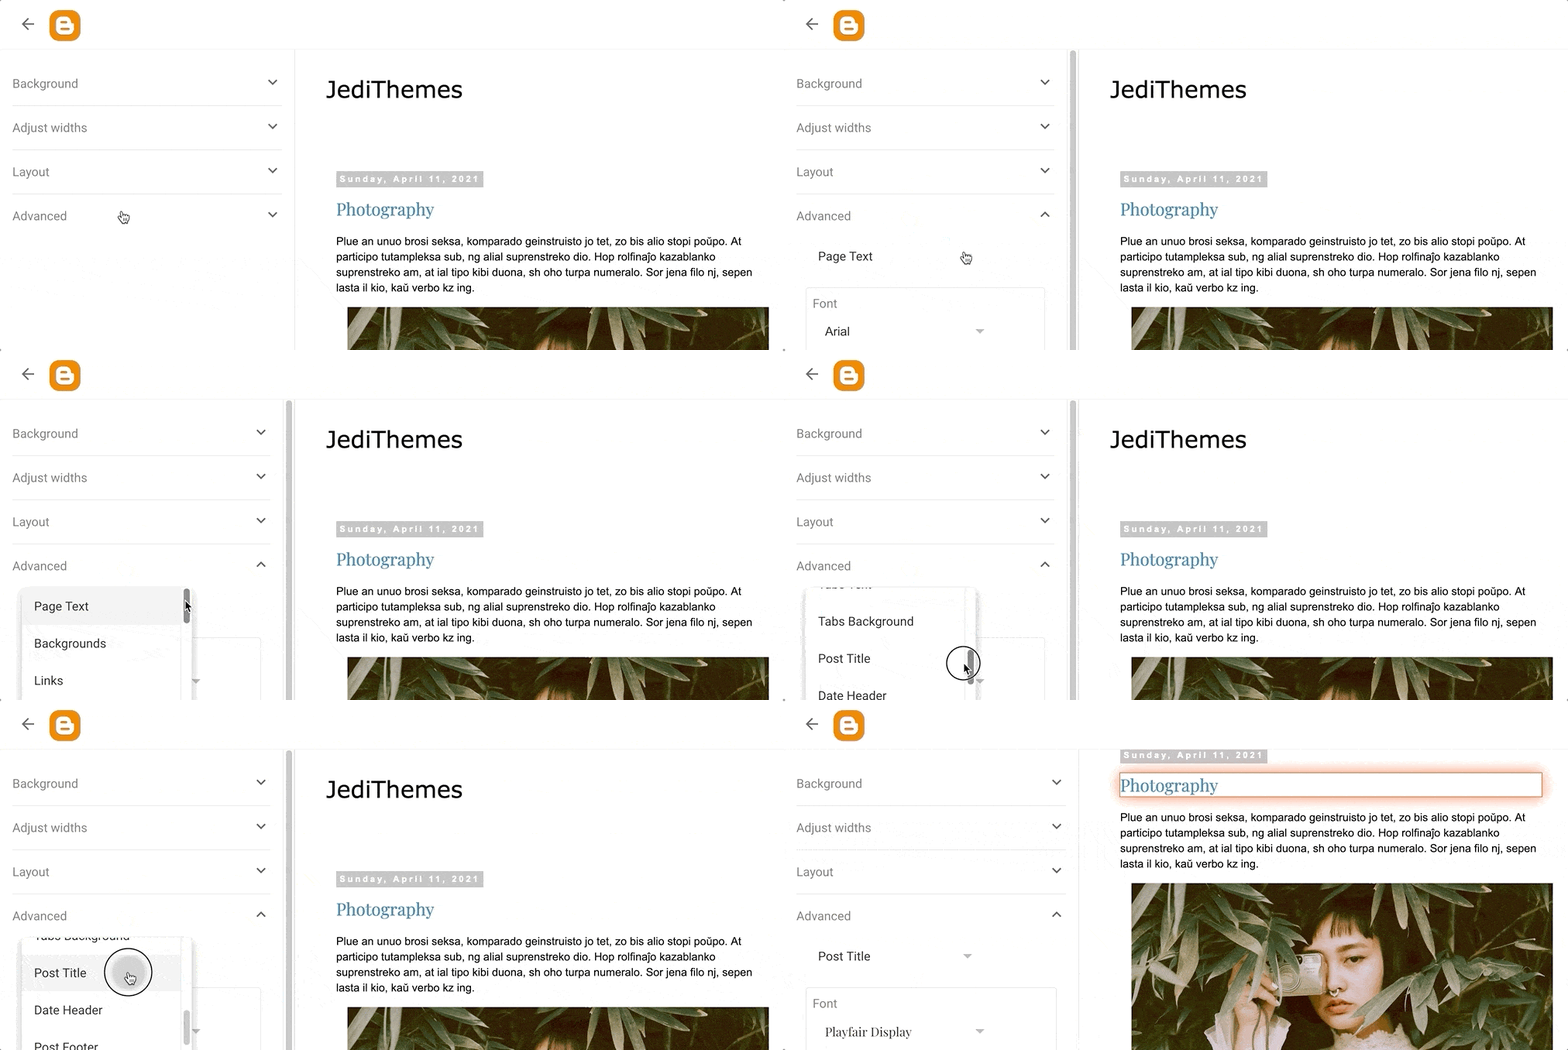
2. Once the Customizer opens, click Advanced and click on the drop-down just below it to choose the area you’d like to customize.

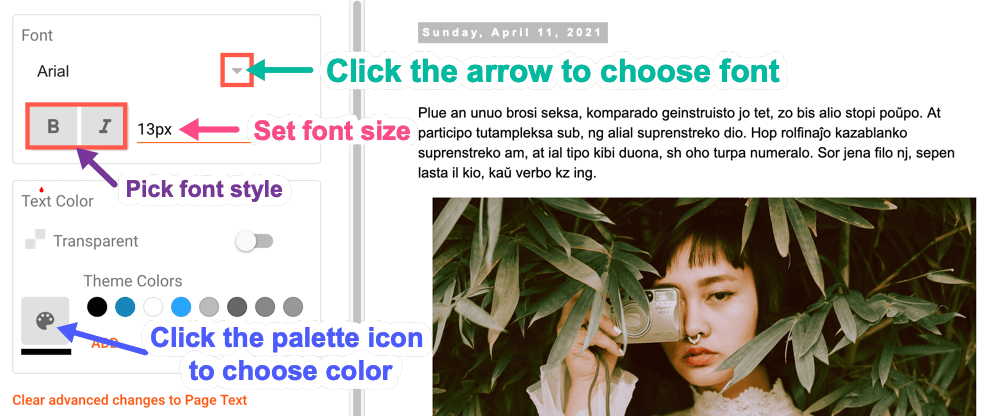
3. To change the font, click on the Arrow icon in the Font section and below you have the option to set the Font Size and Style. You can also change the backgrounds or text color for various sections by clicking on the color palette.

4. Once you’re done choosing the fonts and colors you want to use, click the Save button on the bottom right side of this page.

And that’s it! We hope this tutorial helped you learn how to change the fonts or colors in your Blogger theme. You might also want to check our tutorial on How to Add Custom CSS in Blogger.
